|
10-04-2004
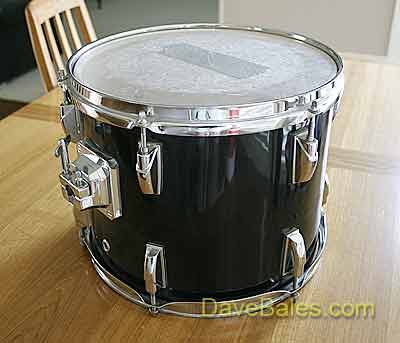
Purchased 12" no-name power tom on eBay. The price was $20.99 with shipping and the auction included a Pearl-style arm. I tried it out on my acoustic set briefly. It didn't take long to realize that this is the perfect drum to butcher on a table saw.
To be clear, you don't need brand name drums to make mesh head pads. As long as it's still round and not splitting, Japanese/Taiwanese drums are fine. The general consensus is that 10" shells are the best choice, with 12" being the maximum.
If you're buying them on eBay, it's worth knowing that there are some crazy-ass people there who are perfectly willing to pay $60 for a mediocre, no-name drum while a decent Yamaha goes for $40. I've been outbid several times on drums that weren't worth the shipping charges. Just understand that there are crazed people who get caught up in the moment and newbies who will run the prices up with five days left on the auction. Between the two of them you're probably going to pay a little more than you think you should.
For me, I finally found a no-name 10" to go along with this 12" drum but at $36 w/shipping the prices have definately gone up recently.
|
|
|
4-09-2005
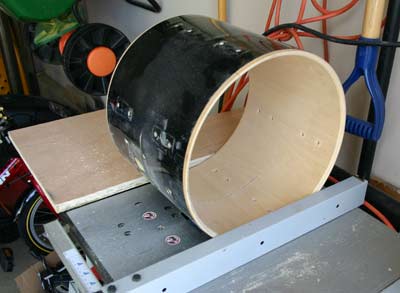
Removed all the hardware from the shell and sawed it in half today. After making it through the holidays and getting sidetracked for several months, I finally got going on this thing again. It would have been a perfect saw job if I hadn't chipped the finish in one spot. For those who are reluctant to do this, it's really not that hard if you know how to use a table saw. Keep the shell aligned against the fence and adjust the blade so it's about 1/8" higher than the shell thickness. You can lose body parts when using power tools. Proceed at your own risk and don't blame me if you lose something important.
If your shell doesn't have a plastic finish, Gary B (founder of KC Drumworks) advises putting tape around the cutpoint of the shell to help reduce splintering.
|
|
|
4-09-2005
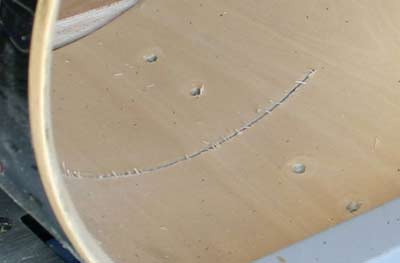
Here's a closeup of the above shot.
|
|
|
4-09-2005
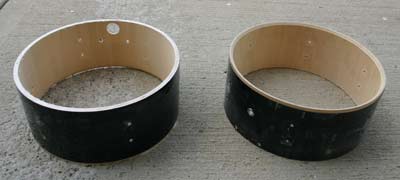
Half-shells on my salt-ravaged driveway.
|
|
|
4-09-2005
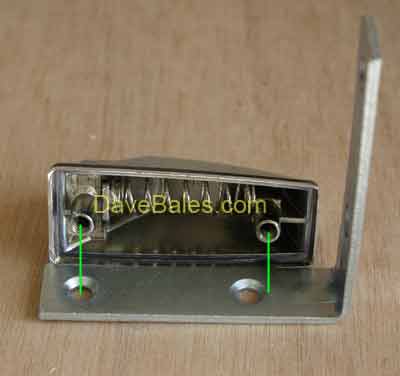
Misaligned screw holes. As you can see, the holes on my no-name lug casings don't match up with the Stanley brackets. A trip to the drill press will correct the problem.
|
|
|
4-09-2005
In this photo, I'm about to drill the hole. I attached the bracket to 2x4's with a screw and clamped the 2x4's down on the drill press. I'm not sure I could have done this with a handheld drill.
|

|
|
4-09-2005
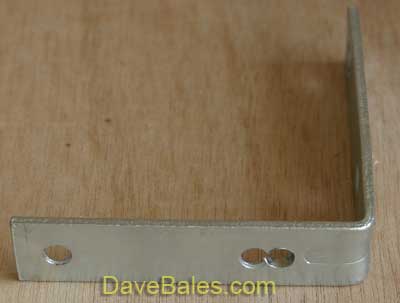
OK, that's done. Three more to go. The new hole is the one on the far right. This process was actually a little unnerving. If you drill too close to the original hole, the bit will creep over into it. That means the bit is bending as you're drilling. Not cool. Beyond being not cool, it makes the part scrap metal.
|
|
|
4-10-2005
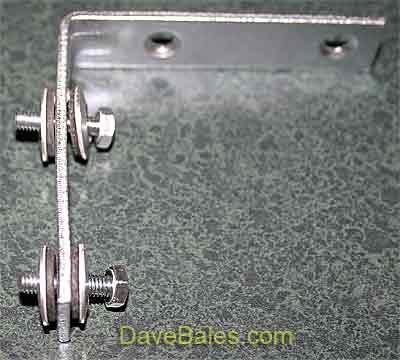
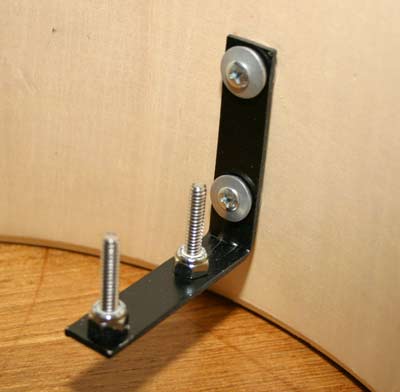
Here's how the washers are assembled around the bracket. It's probably obvious, but that screw then goes into the lug casing. And yes, I bent the bracket. I've decided it's within tolerance. :-)
|
|
|
4-10-2005
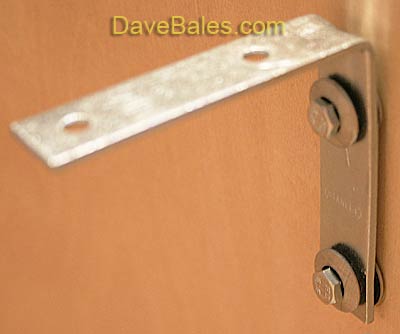
This photo shows a test fit of my good bracket. It gives me a minor sense of accomplishment. Note that these hex screws have been replaced by better fitting Phillips screws.
|
|
|
4-14-2005
Purchased crossbar material locally. $1.24 each.
$8.00 at "Metal by the Foot" got me two crossbars, two perfectly predrilled steel standoff plates (I think it's fencing stuff) and a drill bit intended for drilling metal. While standing at the counter, two guys on the other side of the double doors have a heated exchange. One gets hit in the face. In return he kicked the other guy in the nads. Profanity was in abundance. "You shouldn't have hit me in the face, motherf*cker!" A customer said they sounded like his ex-wife. Alarming.
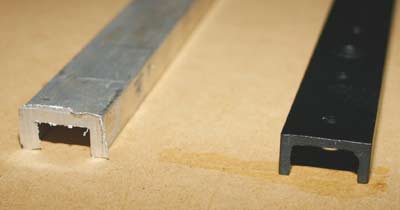
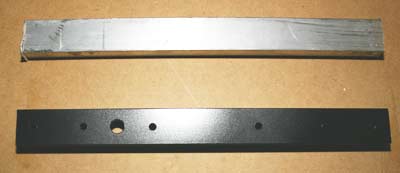
For my 12" drums, I ended up with pieces 10.375" long. They're 1" wide, 1/2" tall, and 1/8" thick. Other builders have used 1"x1"x1/8" but this place didn't have that. Given the task, these should be fine. The pictures show the before and after. I used sandpaper, steel wool, Krylon gray spray primer, and Krylon black semi-gloss spray paint to clean them up. If you decide to paint yours, it seems to help if you pop them in a 250-degree oven for twenty minutes or so. I got that tip from Thomas Henry, I think. If you're building electronic drums, it's worth knowing about him, although he's shut down his website so that may be difficult...
|
|
|
4-15-2005
Bought the worlds most awesome glue for this project. No, I mean it. Hobby Haven sells a product called "Tire Glue" for their model cars and airplanes. This is serious stuff. It joined the piezo to the washer to the steel offset plate and it appears to be very permanent. It's easy to work with and it's black, so it looks good on my particular parts.
|

|
|
4-20-2005
I primered and painted the Stanley angles with the same spray paint as the crossbar. Here they are mounted to the shell with the crossbar screws in place.
|

|
|
4-20-2005
Closeup shot of the Stanley angle. The hex screws from earlier are long gone thanks to my kids interest in this project. The Phillips screws have an angled head, so they seat a lot better than the hex screws. On the crossbar screws you can see how they're held in place with Nyloc nuts. There's a washer on the other side. Not sure if I should have used one on the Nyloc side.
|
|
|
4-21-2005
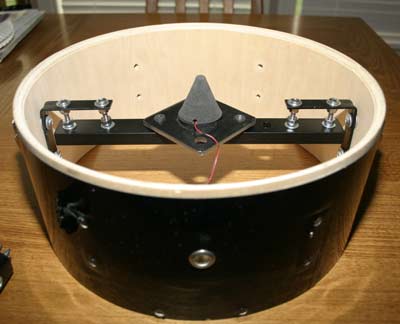
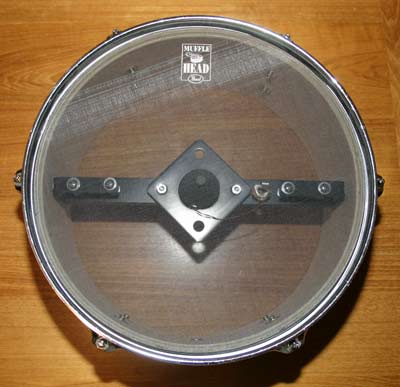
Crossbar assembly nearly complete. I still need to wire up the piezo and install the jack.
|
|
|
4-21-2005
Finished for now. I haven't mounted a tom holder on it yet and, honestly, the shell can't be called a finished product. This is as far as I'm going until I can work out some of the bugs. If you're really paying attention, you may have noticed I added a couple of hex nuts on the standoff plate. When I first tried out the wellnuts, everything held tightly. After a few test fittings, they didn't do as well. The hex nuts were added in a moment of desperation when the standoff plate kept slipping off. Eventually, I'll fix it.
|
|
|
4-27-2005
Still having problems. Specifically, the drum works ok as long as I don't play the fast open-stroke rolls I'm partial to. If I press my knee into it as I play, it seems more responsive. I checked some of the things recommended by the DIY list, but no luck yet. It was suggested that the PM16 may not be suited for mesh drums. That would be a drag. Last night I sampled the waveforms produced by the new drum and an old Paia / Remo-based pad. The images are large, so I put them on their own page.
|
|
5-01-2005
After thinking about it a while, and actually listening to the trigger waveform I sampled, I figured out the problem. The piezo acts as much like a microphone as it does an impact device. So, the recorded trigger sounded like the drum itself. This stands to reason since gluing one of these things inside an acoustic guitar can result in a great recorded sound. The problem is that the ringing drum head confuses the PM16 when I play rapidly. Laying a couple of socks on the head deadened it and proved the theory. Now I need to find a more elegant solution that doesn't sacrifice the feel of the drum.
|