|
| |
|
Paul Nelson on the DIYS forum was kind enough to create PCB artwork for the original EH Polyphase. Here's some scattered documentation of my build, accumulated as I go along. For those who were here a few months ago, my first attempt to build this stalled out shortly after drilling the board. After putting it off for a few months, I'm attempting it again with Paul's new and improved layout. The dates have changed to reflect the second build. For those with a really eye good for detail, you may notice a couple of these photos are from the first build. Suffice it to say I missed a couple of shots. 04/22/2006 Made a slight change to the artwork. The schematic Paul worked from had a couple of 15uf caps that I couldn't locate, so I modified the artwork to accommodate a pair of 10uf and 4.7uf caps. According to Paul, the original schemo has 10uf's. | |
|
07/28/2006 Here's the artwork for the Polyphase (upper right), along with a lot of other boards. The large image in the lower right is a Green Pre Mic Preamp. This was printed on inkjet film with my Epson R200. The film isn't cheap, so it's a good idea to gang up as much as you can on a single sheet. | |
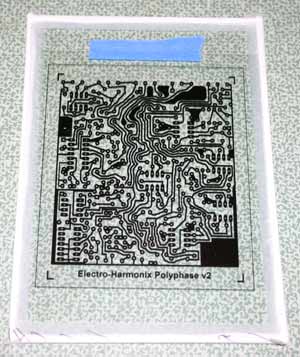 07/28/2006 Artwork after cutting it from the sheet and taping it to the glass. The glass is just plain window glass from a hardware store. I taped the sharp edges for obvious reasons. | |
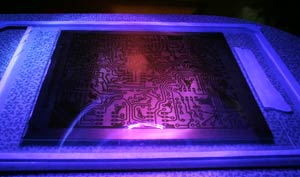 07/28/2006 Here's the board being exposed. For this one I used a blacklight floodlamp. From the top down: Glass > Artwork > Pre-Sensitized PCB > Glass > Table. I positioned the UV bulb 3 inches away from the top glass and exposed for nine minutes. If you do this yourself, you'll probably want to do a test to determine the best exposure time for your lighting. | |
|
07/28/2006 After exposing, rinse the exposed laquer off. The length of this process varies a little, but usually it takes at least 10 minutes. | |
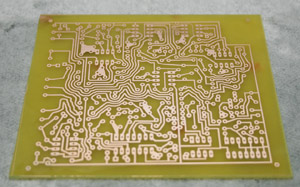
 07/28/2006 When the copper is completely clear, rinse the board in room temp water and this is what you'll have. | |
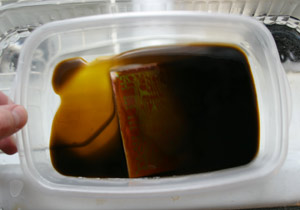 07/28/2006 Etch as usual. Put the container of etchant into another container of hot water to speed things up. | |
 07/28/2006 Here we are after 15-20 minutes of etching. | |
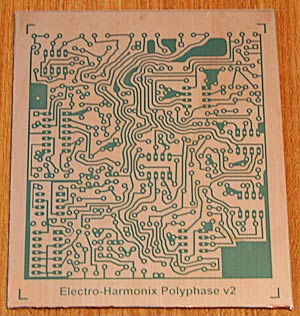
 07/28/2006 And this is the board after cleaning off the lacquer resist. | |
| 07/30/2006 The board is drilled. No photo. It took 50 minutes of effort with a Dremel press. | |
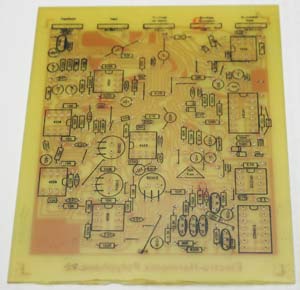 08/03/2006 Added a component-side screen to the board. Extracted from Paul's artwork, printed on a sheet of magazine paper, then ironed it on. Not bad. :-) | |
 08/03/2006 Here's a closeup of the above photo. Note: the 15uf caps look "off" because I changed the trace side of the board without changing the component layout. That's my fault. Everything else looks near perfect. |
Main Page